Monday, May 31, 2010

Baskets for birthdays


Esther and Ellamay saw these at the Reject Shop recently when we were there and desperately wanted them. I told them no but went back later and bought them. Considering they were $3 each I thought I could cope with that price and I have been saving them up for their birthday next week. To me though, they look at little $3-ish so I am changing them to be so much cuter! I have been working on them today and only have to sew the new lining in tonight (hopefully - if the kids actually sleep before I get too dozy to stitch). Stay tuned for the photos in the next few days.

Oh no! Where is Jemima?


Ellamay has a grey teddy bear called Jemima, that she must have at bedtime every night. On Friday, she took it to school. Friday night, at bed time, guess who was missing from her school bag? She was very upset and took forever to settle down.

She decided to draw a picture to put up at school to ask people if they have found it. She did some writing on it too. It says "Oh no! can me..." She is just learning to write and she can write those words without checking the spelling. (We are finding a lot of Oh no! notes around the house). It was a sad weekend without poor, lonely Jemima. Hopefully, she finds her today at school.


Meanwhile, look at what has happened last week. Ellamay has now lost both her top teeth! (Smiling in between her sadness at her missing bear and sporting bed hair).

Not that she likes people to see. Have a smiley day.

Sunday, May 30, 2010

Road sign


I was driving into town the other day and I came across this sign. I have never seen a sign that actually says "thank you" on it. So I pulled the car over and used my new whizz-bang camera phone to take a picture of it. Who'd have thought that this sign could make me smile. Actually I think it might have been a combination of the sign plus the fact that some road workers came speeding up in their Ute just as I was getting back in the car. I suppose they thought I was up to some sort of mischief. And I suppose I could have stopped and explained to them that I was just a funny kind of person who is amused by random road signs. That would not have been as much fun though would it?

Have a great day and I hope it has a little bit of funny in it too

Saturday, May 29, 2010

11.37pm

Why does inspiration hit at 11.37pm? Last night I didn't get started doing my own thing until after 10pm because those darling children of ours wouldn't settle and I kept falling asleep doing Amelia's physio. That would probably tell a regular person to go to bed at 10pm. Not me though. I get too busy when I am tired. And by busy I mean not very effective or efficient.

I started off sewing a button onto the note book and pen cover I have made for Ellamay's birthday. That was supposed to fill in my time while I had a cup of tea before bed. Then I decided to get some sewing things ready for the kids to try out today. I cut up some plastic canvas and found the packet of plastic sewing needles. All I have for them to use for their sewing is a cheap packet of embroidery cottons so I decided to wind that onto card to make it easier to use.

Then I looked over at the box kitchen sink I had been working on during the day so I put down the cotton winding to go and paint the coat hanger door handle silver. While I did that, I was thinking about the secret stitching I have on the project list at the moment so I washed the paint up and went and got out my inspiration folder and searched out a pattern for letters, only to find that they were totally wrong.

I put that away after finding one or three more things that I had forgotten about and now really want to make again and then went back to winding. I REALLY wanted to start the stitching project but it was time to go to bed.

I should have had my visual diary out to write some lists in instead of all the running around. I am surprised I achieve anything. I should have gone to bed.

I hope to upload a bunch of photos today so I'll talk soon.

Friday, May 28, 2010

65 Roses Day


Today is 65 Roses Day. It is a day to raise funds and awareness about Cystic Fibrosis. This is a cause close to our hearts as our youngest daughter, Amelia, has CF.

Here is a little bit taken from the 65 Roses Day website about the reason for the name.

"65 Roses" comes from the folklore story of a little boy’s effort to pronounce his sister’s condition; Cystic Fibrosis. Instead he called it "65 Roses".


The rose is the national symbol of Cystic Fibrosis. Roses are often considered the ultimate expression of natural beauty, their magnificent bloom and fragrance, juxtaposed on a thorny stem, have captured imaginations for centuries. As a living thing roses can endure harsh conditions, but flourish with care and attention.
Many parallels can be drawn between the rose and a person with CF. The condition Cystic Fibrosis imposes harsh conditions on the lives of those who suffer with it, yet there is a resilience and charm about each person as a result of their struggle and connection with the beauty of life.


For these reasons the red rose has been adopted as the national symbol for Cystic Fibrosis in Australia.


Go here to learn more about it.

Thursday, May 27, 2010

Mid-craft...

I am currently in the middle of...

-various felt clips and head bands

-several felt pinwheel hair clips

-secret stitching pretties

-3 (or maybe 4) note book and pen holders (something like this one)

-more paper flower garlands

-a new and improved cardboard box kitchen

I have a stack of other things too but these are the ones I am working on at the moment. I really want to try doing some applique onto Amelia's tops. So far though I haven't managed to start that one. And Esther and Ellamay's birthday is fast approaching and I really wanted to make more stuff for it. I am making the note book and pen holders for part of their presents and will buy some other "whatever" to go with it. They will not be having a party. They will probably have one friend each over though. And I will be forced (by myself) to try to make something cool to give all the kids for "not-a-party" party favour thingy's. What can I say? I can't help myself. Don't really know what yet though.

I should really go and do that other thing I am working on. Housework. Blah.

Wednesday, May 26, 2010

Visual diary

In the beginning of the Crisis, I made a list of my Resolutions for 2010. One of them was to start using the visual diary and fineliners I had bought. Well, I have been using them. I am not an artist and I struggle to get what is in my head onto my page, but I am working on it. I guess I don't really care that it is just a lot of scribble because it is developing ideas. And I am satisfied knowing that the great idea that I had the other day is recorded and I can work on it more rather than forgetting things in the busyness of life.
This page has a few ideas scribbled down about the cloud mobile that I wanted to make. I had a general idea and I worked on it in the book before it came to doing anything.
When things have been too busy or the kids are sick or if don't feel like getting out projects to work on, I can just get out my book and scribble away. It is a quick hit of creativity and a great way to remember what I am up to. I hope if I keep it up, that my drawing abilities (or lack thereof) will of course improve. In the meantime, this is what my book looks like. It makes me feel clever. And that makes me feel good.

Project 52 - 18th and 19th date - Cupcakes and a hot bath.


Our 18th date - I am going to say we had a two part date this week. On Saturday night, it was Tim's turn to plan. I don't think he had come up with anything. I suggested we make some banana cake or something because we had a bunch of bananas in the fruit bowl that needed to be used.

Once the kids had (finally) settled and were all asleep, we got to it. We have never made this banana cupcake recipe before but it was super easy and really yummy. It was fun to bake with Tim. The cupcakes sunk a little in the middle which I think was either that we used margarine instead of butter or because I am still trying to work out our ovens temperature settings (we have had for 12 months! I should know by now). It didn't matter anyway because we made the cream cheese frosting and it just meant there was more frosting on top - yum!

On Sunday, we had roast lunch at my parents house, which has become a Sunday tradition for us (thanks Mum). After lunch, we left the kids with my parents and Tim and I went out to the shopping centre to pick up another course of antibiotics for Amelia. While we waited for it to be ready, we went and shared a choc mint thick shake and just enjoyed a bit of time. It's been quite a while since we could be out together like that. Not exactly the most romantic of settings, but it was gold anyway!

Our 19th date - We had been through a rough week. We had both been dealing with issues separately and together. The date started off with me needing a cry on Tim's shoulder. He decided to run me a nice hot bath and he sat a small plastic stool and talked to me while I soaked. It was the first chance we had all week to sit and just talk about nothing much. Those are my favourite conversations after a hard week.

Go over here to see the date night's other people have had this week.

Saturday, May 22, 2010

Banana cupcakes

Tim and I made these cupcakes for a date night and they were delicious. Since I have been posting cake recipes, I thought I would continue.

225 grams unsalted butter, softened
225 grams caster sugar
225 grams self-raising flour
4 eggs
1/4 teaspoon nutmeg
225 grams mashed ripe bananas

Preheat the oven to 175 degrees C. Place 18 paper baking cases in muffin tins. Combine the butter, sugar, flour, eggs and nutmeg in a large bowl and beat with an electric whisk until smooth, about 2-3 minutes. Stir in the mashed bananas until well combined. Spoon the batter into the cases. Bake for 20 minutes. Remove tins from oven and cool for 5 minutes. Then remove the cupcakes and cool on a rack.

To make the icing

200 grams cream cheese
175 grams icing sugar, sieved
1 tablespoon lemon juice
1 teaspoon vanilla essence
1 banana, thinly sliced

Slowly beat the cream cheese in a large bowl with an electric whisk until it is soft and smooth. Add the icing sugar, lemon juice and vanilla. Beat briskly until smooth and well combined. Swirl the icing onto the cooled cupcakes. Garnish each cupcake with a banana slice.

Store without icing in an airtight container for up to 3 days, or freeze for up to 3 months.

These were yummy and easy to make. Off you go. By the time you are done... and maybe after you have eaten a few, I might have actually written a few more posts!

Friday, May 21, 2010

Autumn


I love autumn. Leaves can be so vibrant. I love driving through the streets with the leaves falling and I love to crunch them under my shoes. This photo is of a tree in the front yard. We only have a few trees that loose their leaves and this one is by far the best. The others go kind of browny yellow. I also love autumn because the days are cool and the nights are great for snuggling under the covers and sleeping soundly (hopefully).

Anyway, all I really have to say is that I hope to be back in the next day or so with some more posts. Including a banana cupcake recipe which is YUM!

I am working on some new things for Esther and Ellamay's birthday which is next month, doing the regular life stuff and also trying to get through a few moments with Amelia.

Thank you for all the comments too. It's a real buzz to find that people are out there reading the Crisis here.
The farm fences from my last post were featured over at One Pretty Thing and also at Craft Gossip. Pretty excited about that.
See you soon.

Sunday, May 16, 2010

Play farm fabric fences

Last year for Amelia's 2nd birthday I decided to make her a farm play set. It came from inspiration that struck while I looked around the toy shop for gift ideas. We already had a lot of the usual type gifts because Esther and Ellamay have had plenty of toys over their years. I really didn't know what to get for Amelia. I found some cheap plastic farm animals and the above is what I came up with.

This post is about the farm fences. I thought about making some out of paddle pop sticks but I knew they wouldn't last. And all the plastic ones that come in farm sets are usually pretty useless at standing up.

You will need some fabric (I used a fat quarter) and plastic canvas. Firstly, I used the animals to size up how high the fences should be to keep them from escaping. I made four panels of plastic canvas, 4cm by 13cm.
Adding a little extra for seam allowances, I made tubes (is there a technical term for that?) stitching the fabric right sides together. Stitch one end closed and then turn the tube right side out. Iron.
Then bend, curl and fold (whatever works) the plastic canvas and wrestle it down into the end of the tube. Do this with all 4 pieces.
Making sure that the first piece of plastic canvas is pushed into the closed end, sew a line as close to it as possible without actually stitching on it. Do this for 3 of the pieces.
Close the open end by folding the extra fabric into the tube and last piece of plastic canvas and sew it closed with the sewing machine.

And there you are! They fold up and stand up and keep those animals all together.
I thought about making a little tab on the ends so they could be joined together with Velcro, a press stud or a button, but I decided against this. They work fine without any fasteners and they are much safer for small kids too.
Here is Amelia playing with the extra fences that I have only just finished! Her birthday was in September and I have only just finished it now!

I hope you can follow what I have written here. It feels a bit clumsy. These are the easiest thing to make so get on and make some. Please let me know if you do. I would love to hear about it.

Al foil tiara's

This craft came from a library book that Ellamay bought home from school called "The Usborne Princess Treasury". The girls had fun rolling up the al foil to make the crowns, but they really weren't in the mood for the difficulties in getting the al foil to stick to the cardboard. The sticky tape wasn't doing the job. We got there though. Taking photos afterwards was all too much for them, so I only managed to get one of Esther. It wasn't long after this that Esther decided she didn't want a tiara any more so she pulled all the foil off and turned it into jewellery. So next time I need to entertain them, perhaps scrunched al foil jewellery will be what we do.

Saturday, May 15, 2010

Cloud Mobile

Cloud mobiles seem to be quite a popular thing at the moment. I have seen them around the internet for quite a while. They look great. And there are so many different interpretations of them. I decided to have a go at making one. I wanted to embroider onto it though.
After a trying writing onto the felt with a water soluble pen, free hand stitching and sewing Aida cloth to the back, I used baking paper that I wrote the quote onto and then stitched it onto the felt. It worked okay. Though if I am ever crazy enough to do such a small font on acrylic felt again, I will do tighter stitches. The text lost a little bit the form when I tore off the paper.
The quote is one that Tim found on the Cystic Fibrosis Foundation website (a US site) not long after we found out about Amelia's diagnosis. It reads "life isn't about waiting for the storm to pass... it's about getting out there and dancing in the rain."
I love how the raindrops and heart have turned out. I love the whole thing actually. Except maybe the size of the quote. But then I didn't want it to be huge.
Here it is hanging in Amelia's bedroom. See the flower garland is finished and hanging up from this post. Love the way it turned out. Still have to make some more for Esther and Ellamay. And that is Amelia's name canvas. Painted by her artist Aunty.

Birthday crowns


Esther and Ellamay are turning 6 next month. I thought I would post about the birthday crowns I made for their last birthday. So super easy and last so much better than any of those cheap plastic tiaras that hardly even last for the car trip home. The crown tutorial is found here. The tutorial calls for wool felt but as with all my felt projects so far, I just used acrylic. I followed the suggestions made here to make less elastic part and more felt.

I did a couple of things differently. Firstly, instead of using the fusible webbing in between the felt, I used some cheap craft foam. It worked perfectly as it gives the crown strength to stand up properly and it can still bend without any worry of breaking. The first ones I used self-adhesive foam but it gummed up my scissors so much that I just used plain foam for the rest and stuck the foam and felt together with a swipe of glue stick glue. Just enough stick there to keep it in place while sewing. Secondly, by the time I got to finishing off the elastic part, I didn't bother with the casing. The kids didn't care - so I won't either.

I made about 6 of them for party favours last June for Esther and Ellamay's 5th birthday party. They loved them. The one in the picture below was one I made for a birthday present for one of their kinder friends. Big hit! I paired the crowns for the party (and this present) with a $2 sparkly scarf from The Reject Shop and some other bits and pieces and we were in business.

Now looking at the great dress up things on ikatbag, I might have to have a look at making some more of those for this birthday. Especially those masks...

Friday, May 14, 2010

Buttons and hair pins

I saw this great idea over at One Crafty Mumma and decided to have a go. I have quite a reasonable collection of buttons to use for any project really. I would like to get some more interesting buttons though. Old ones and sparkly ones. I went on a trip to Echuca some time ago with my sisters-in-law and we went to a quilt shop there. They had these huge tubs full of buttons. You could buy them by the scoopful. Why didn't I that day? Anyway, here is a picture of the ones I have made.
I really quite like them. Even though I made so many I have really only worn two of them. If I was a more coordinated person who could do actual hair styles instead of simply "there it is" styles, then I might have cause to use more. I will have to work on that.

Buttons in our house have become a big deal because while Amelia has her saline treatment on the nubilser (pump) she plays with the buttons to keep her happy. Esther and Ellamay help too. They use their tea set and pour the buttons from one container to the next, stir them with spoons and make all kinds of interesting things. We end up with buttons from one end of the house to the other. Whatever works to keep Amelia on there though. So I should be able to justify getting more buttons really. Yes. I think so.

Still trying to get my felt cloud mobile finished. I am so close to being finished but I am sick of it. Amelia decided to help the other day and actually cut one of the rain drops with my embriodery scissors. One of those "NOT THE GOOD SCISSORS" moments.

Thursday, May 13, 2010

White Chocolate Mud Cake

A while ago I did a post about my yummy Chocolate Mud Cakes. My friend Broni, (Hi) asked about how to tweak the recipe to make it a white chocolate mud cake instead of using dark chocolate. I have never been much of a recipe "tweaker". Fortunately, I have got a recipe for a very yummy white chocolate mud cake too so here it is. Just for you Broni :-)
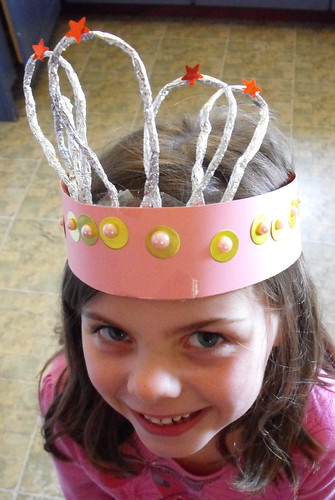
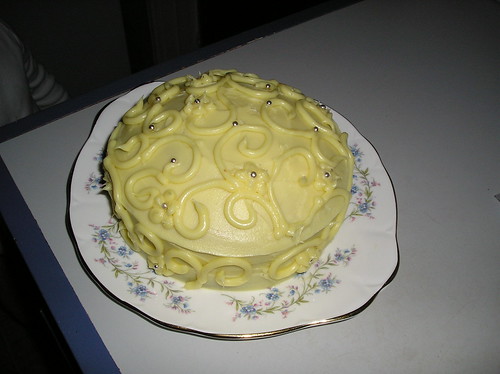
(I know I am recycling the photo here but I didn't have anymore - plus I think this one probably actually was a white chocolate mud cake)
Total cooking time:   1 3/4 hours

250 grams unsalted butter
150 grams white chocolate
2 cups caster sugar
1 cup milk
1 1/2 cups plain flour
1/2 cup self raising flour
1 teaspoon vanilla essence
2 eggs

Grease and line base and sides of cake pan with one thickness of baking paper, bringing paper 5cm above side of pan. Combine chopped butter, chopped chocolate, sugar and milk in saucepan; stir over low heat until chocolate is melted and sugar dissolved. Transfer mixture to a bowl; cool 15 minutes.
Stir in sifted flours, essence and lightly beaten eggs. Pour mixture into prepared pan.
Bake in moderately slow oven (160 degrees C) for 1 3/4 hours. Cover cake with foil halfway through baking if cake is over-browning. Cake will develop a thick sugary crust during baking; test for firmness by touching with fingers about 5 minutes before end of baking time. Then, test with skewer. Cool cake in pan.

tip The cake will keep will for 1 week in an airtight container; or, it can be frozen for 3 months.

These are my tips from the other mud cake post. Check this post too for the ganache recipe.
Use eating chocolate for a fudgy texture to your mud cake. I just use the supermarket brand chocolate. Not the really cheap stuff, the next price up from that :-).
If cutting the dome off the top and slicing the cake horizontally to decorate and fill, make sure the cake is cold from the fridge to avoid breaking. If it does break, try "gluing" it back together with the ganache.

So there you are. Another yummy cake recipe to cook up. I actually use this one more than the other because it's not quite as rich and it is a lot quicker to make up I think. It's much the same as a cupcake recipe version I have. Perhaps I will do a few more cake recipes on here. I have a caramel mud cake recipe too. Anybody interested in that? Can't remember if I've made that one before or not.

Esther and Ellamay are turning 6 next month so it is probably a good time to start talking about cakes.

Hope to be back soon with another finished project. That's if I can get everyone into bed and asleep for a night or two.

My first camera

This is my first ever camera. I got it for a birthday present or maybe Christmas when I was about 12. It was purchased from the local newsagency in the toy section. I think it was about $15. That was heaps of money back then (in the olden days). After seeing so much about plastic toy camera's around the internet lately, I asked Mum to dig this out for me. We weren't even sure if was still around.
It's so funny that Mum had to write this message on the back. I wasted quite a bit of film by forgetting to take off that lens cap.
I had a look on ebay for prices on 126 film because I thought it might be fun to try it out again... now that I am grown up and have taken thousands more photos since back then. Doesn't really matter though, at least I can look at it on the shelf. It looks pretty. I will have to dig out the photos from back in the day and scan them and post them. Have a happy day and keep warm.  :-)

Wednesday, May 12, 2010

Sand sculptures

After watching "This is Emily Yeung" the other day on ABC Kids, Esther decided to have a go at making a sand sculpture of her own.
Just in case you can't tell, it's a dolphin with its head out of the water and it has a tail and fins there too somewhere.
Ellamay and Amelia were in on the action too. Can you see the little baby dolphin next to the big one. So cute and clever.

Project 52 - 16th and 17th date

The 16th date - I had come up with a few different ideas of what to do for date night. Unfortunately, the things I had hoped to do didn't work out for this date. I will save them up for next time. We were so worn out by the time it got to date time anyway it didn't matter. We had spent our Saturday working outside in the yard and chasing after kids.

I would like to say that we did something as exciting as the light painting from our 15th date, but we didn't. We spent the date with a cup of tea and watching more of Grand Designs on DVD as we did on our fourth date. It is such a great series. The personalities on it can be a bit frustrating at times. It is quite inspiring though because one day we dream of building our own grand design (of some description).

The 17th date - We have had such a crazy couple of weeks... Back down to Melbourne for a clinic visit with Amelia at the big building and our 10th wedding anniversary! And of course it was Mother's day on Sunday. So our date night, Saturday night, ended up being spent with my in-laws in town, to celebrate Mother's day.

We had pizza and sat around and talked and had a relaxing time. Amazingly, the kids were well behaved even though it was night time and was quite late by the time we got home. It's pretty rare these days that all of Tim's family are in the one place at the one time. And it's pretty rare that we go out at night, even with the kids in tow.

Our 10th wedding anniversary - I would love to say that we had a "real date" for this but we didn't. We had a steak dinner with our little darlings at home. Tim gave me a bunch of flowers and I made him a little book of why I love him. Life has turned out a lot differently to the way I imagined it would be by 2010 but I wouldn't have it any other way. (Love you, Tim)

If you would like to see more of Project 52 click over to here.

Tuesday, May 11, 2010

Rewards chart

What a hectic few weeks it's been. Aside from all the other regular frustrations, its been frustrating not being able to sit down and update the Crisis. I thought my first post back after this break had better be the (nearly) complete canvas I started quite a while ago.

We have the usual kid troubles where our little darlings won't do their bit of cleaning up their toys and routine things without it turning into a big drama. So I wanted to try out a rewards chart. I have seen plenty of variations around but they mainly cater for only one child per chart. I wanted one that would suit all three kids. I used a large canvas and measured up a grid on there to suit. I painted it up in Esther(pink), Ellamay(purple) and Amelia(green) colours.
After making sure our house was looking the way it should ;-) I took photos of the areas that I would like expect the kids to do as their jobs. I took photos of each of the girls too. I printed all the pictures and covered them in clear contact. I used adhesive Velcro to attach the job photo to the canvas. The same with the kids faces (the reward token).
In theory, everything is the way it should be. In practice though...

I still have an awful lot of kids faces to cut out. I didn't do the sums, in the beginning, to work out how many faces I would need to cover the whole chart. Supposing that the kids would ever do enough to need all those faces/tokens. Anyway, I will keep trying to get the kids to do their jobs. I think I will take off a couple of the photos of the jobs and sweeten the deal a little so they might actually do something. I just need to remember to make it part of our routine. If all else fails, bribery is the way to go.

Saturday, May 8, 2010

Still here...

The last couple of weeks have been a bit crazy around here one way and another so I am afraid this Crisis has been a little neglected.

Just to add to the hassles of late, my laptop has... met with an untimely (some may argue 'timely') end and so I am trying to use Tim's, which is different to mine.

I hope to back and blogging in the next few days. I have quite a few photos to upload and a some new projects that I have started (what a shock). And a date night or two to update also.

See you soon.