Showing posts with label Paper craft. Show all posts

Wednesday, May 11, 2011

3D Easter eggs that became other things...

Okay. I know Easter was last month now. You will just have to smile politely while I catch up :-) Got your smiles on? Here goes the first of the late Easter posts. Call it preparation for next year.

This craft is from the Disney Family Fun website. If you haven't seen this site before, it is an excellent resource for kids crafts.

3d Easter egg craft

This is the one I made. It started off being Amelia's but she lost interest because it was "a bit too twicky, Mummy". We decided to make them with only two sides of the folded paper because it was a bit harder than we thought it was going to be. The one I made could hang on the art string in the kitchen easier then too.

Ellamay and the bunny house

Ellamay and Esther both turned theirs into bunny houses. Ellamay's had staircases and striped floor boards.

Esther and the bunny house

Esther went with pink flooring.

Bunny in the house


And a bunny inside. The photo below he was having a sleep I think. He looks a little sick. Perhaps too many Easter eggs?

Esther's finished bunny house

Ellamay ended up creating a pathway off the side of her egg bunny house.

Ellamay's finished bunny house

They dreamed up all kinds of stories to go with them too. I think they had a lot more fun making these than playing with them. And a lot more fun making them this way than the original idea. It's great to see the kids take an idea and make it their own.

Saturday, April 23, 2011

Cardboard hand bags for Easter

Cardboard bags

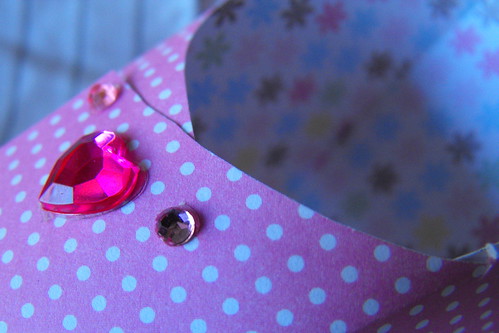
The kids put these together on the pump the other night. I had previously cut out and assembled the cardboard base. The girls then chose their favourite scrapbook paper to cover it and made the beads on pipe cleaners for the handles. I hope they last until Easter morning because they have been loading them up with things that shouldn't go in a bag made of cardboard and we have had to repair them with sticky tape a few times. I think I should have used some thicker card for the gusset.

In case you want to make some of these, I first saw the idea over at ikat bag. This blog is a favourite of mine especially for all the cardboard creations... but then I love all of it. There is a printable template and instructions on how to make them. We will be making some of these again.
Saturday, March 5, 2011

Paper cup lighthouses

This is a quick, last minute craft I came up with for the kids to do during Amelia's pump time.
Paper cup lighthouses

I love lighthouses. I have a collection of little wooden ones from souvenir shops. This craft was from a sudden inspiration that hit me when I was trying to decide what we could make using these LED battery operated tea light candles. I found mine at the Reject Shop in a pack of 4 for $3.

We used a paper cup, a plastic cup, coloured paper, glue, markers and our LED candles. You can probably see how we made these. We covered the paper cups in white paper first and then added strips of red paper. Using our markers we added windows and a door. Then we added the bottom half of a plastic cup (which was a little smaller than the paper cup) for the top. We coloured the top with the black markers, added the LED candle and we were done!
Paper cup lighthouse lights

Ellamay added a Barbie sticker to her lighthouse because apparently Barbie can be a lighthouse keeper as well as all her other careers :-)

The kids loved this. They have their lighthouses in beside their beds now. The candles flicker just like real candles so it makes the lighthouses look great in a dark room.

This would make a cool craft even with out the candles. Perhaps you could use some al foil in the top for the light. Or stick it over a torch. Just a few thoughts. (I probably don't need to point this out - but I will. These LED candles are not suitable for small children. They are a choking hazard.)

Have fun. If you have any great ideas for pump time activities, let me know :-)

Tuesday, February 1, 2011

Paper town


Paper house

In some of our Esther, Ellamay and Mummy time, we made this house and cars. I found this paper craft site called Canon Creative Park. It has heaps of great paper craft stuff on there. The kids and I decided to go with the Craft town option. We printed the pages out and I cut it all out after the kids were in bed. We spent our time together the next day, folding and gluing it all together. Now they want to make some more things to go with it. I have printed out the school but only half cut it out. Just as well we only have cheap ink in our printer is all I can say. :-)

I want to make quite a few things off this site. I found a cool camera that holds a photo and a matryoshka doll that I would love to make. Though the doll takes 17 pages plus 6 pages of instructions. I will have to make sure we have plenty of ink before I start that one.

Light tent play

I wanted to add this photo in to show you my photo tent that I got for Christmas. I ordered it. I am responsible for the fact that it is ridiculously huge. I need to work out how to use it best now. I think my lamps are not quite right. It's still pretty fun though. I can add it to my growing collection of stuff for photography that I am not entirely sure how to use. :-)

Thursday, December 23, 2010

Christmas tree treat cups

Spoiler alert: Any family members reading this need to stop reading now and come back after Christmas. Or act surprised when you get one of these from the kids on Christmas. Okay? Good.

party hat trees

Our treat cups are done for this year. What a relief! Almost last minute. Using similar ideas to our previous years treat cups, we used a paper cup as the base. Esther decided we needed to make Christmas trees. I was trying to work out how I could get the right shape for one when I saw a party hat the girls had. I just flattened it out and traced around it onto some sheets of green card.

flat hat tree

Party hats have a little flap that fits into the slit to make them stay together. Perfect. It made rolling them into their cone shapes so much easier. The girls all helped painting the paper cups brown for a tree trunk and then decorated the cone trees.

Preparing lollies for tree treat cups

Of course, the part where we filled them with lollies... well... that takes a long time when little girls have to taste test them :-)

Tree treat cup preparations

We attached the cone to the cup with double sided tape.

Sparkly pipe cleaner star

The star on top is made by twisting a glittery pipe cleaner around a star cookie cutter.

Finished Tree treat cups

The finished product. We made 14 of them. And I hope by the time we give them to all the family, there is still 14. They are full of lollies remember! Mmm... lollies.

It has been a busy week this week. Christmas break ups, shopping and visits to the big building have really taken their toll on everyone. Hopefully, after a good night's sleep tonight, we will all wake up ready for the festivities over the weekend. In fact, I am quite sure the kids will be up at some ridiculous hour in the morning just because it's Christmas eve. They have been excited today because its Christmas eve, eve. Anyway, I have got another one (or maybe two) posts to squeeze in before Christmas so I will see you tomorrow.

Cardboard gingerbread houses

Flat house pieces

Last Christmas, I saw lots of ideas of making glittery houses for Christmas decorations. Small round cardboard tube houses, paper cup houses, grand cottages cut from paper and card. I really liked the ones that had lots of windows and a little LED candle inside. Pretty. This is what I came up with for us to make. We made some last year and we have finished some more for this year.

Cardboard gingerbread houses. I used the dimensions for the fabric dolls house and cut the pieces out of scrap photo mat board. It's great for this project because it is so sturdy.

Blank houses

The pieces are all stuck together with tape. I made a window and opening door at the front. The back panel, was cut 1/3 of the way across. Does that make sense? So it has one wide door and a small door. Then the back wall opens out so the inside can be played with too.

Decorated Cardboard Gingerbread Houses

The girls painted them brown (not a very good gingerbread colour - but that is all I had) and then once they were dry they decorated them with foam stickers.

Felt gingerbread men

And these are the little gingerbread men I made (in the girls favourite colours) to live inside. I made them last year too. I traced around a cookie cutter and decreased the size until it was the right size for the houses. I used 2 layers or felt for these to give them a bit of thickness. The kids are having great fun playing with these. They line all the houses up so they can be neighbours and go over to each others houses for tea. It's very funny.

Sleeps til Christmas... 2!!!

Wednesday, December 22, 2010

Our decorated tree


Santa

I can't believe Christmas is only days away. I had a list of things to do and I have gradually been deleting things from that list that I have no hope in getting done. Oh well. It was only extra stuff anyway. Not going to lose sleep over it. Anyway, I thought I would share our tree. The kids decorated it. I am cool with that. I use to get stressed about these things but I can deal with a kid decorated tree for a few years. They won't be kids forever. I love to see what they make. They are starting to get more of their own ideas about how to do things so I think next year will be interesting to see how they do it then.

Amelia's silver decoration

Our tree is a mixture of store bought decorations that have been strong enough to stand up to the kids 'attention' over the years and homemade decorations. Last year and this year I have bought packets of the cheap baubles from the Reject Shop and gave the girls some permanent markers and glitter glue and told them to decorate. They love it.

kids tree decorations

We have lots of white card shapes covered in pens and glitter glue. And a really long white and yellow paper chain stuck together with cheap Christmas sticky tape (also from the Reject Shop).

Our tree

This year, my contribution was a recycled Christmas card circle garland. Seems everyone in blogosphere is making circle garlands and I thought it would be a great way to use up a pile of old cards.

Christmas card circles

Lastly, presents do not live under our tree. I remember what we use to get up to as kids when we were little and I am not having that! The presents come out Christmas morning when everyone (Mummy and Daddy) is awake enough to care about opening presents. The kids have their Christmas stockings to entertain them until it's present time.

Counting down the sleeps now. :-)

Paper Reindeers

Christmas reindeers

When I first saw these I had high hopes of having a whole herd of them under our tree. But then I started cutting them out! Those antlers made me crazy. I even cut off some of it off to make it easier to cut out. Anyway, the kids did these when Amelia was on the pump one night. Esther and Ellamay are probably almost old enough to cut these out by themselves, but I did it this time so it was a quick craft. I love those googly eyes. I don't why we haven't used them before now. I will be stocking up on them after Christmas because they are a cool thing to have in our craft supplies. Go over here to find the printable reindeer craft.

Tuesday, December 14, 2010

Star trees

Star trees

Aren't these cool? Paper Christmas trees made from different sized stars. Mum cut out all those stars for Esther and Ellamay to make these a couple of years ago. We found the craft in the Better Homes and Gardens magazine that year.

Mum used a plain paper cup for the base and stuck through some pencils for the trunk. Then they just pressed the stars onto the pencil and twisted it into position. The girls were quite proud of themselves for these trees. The trees sat on our table (in between getting thrown around the house) as decoration.

I was googling around trying to find this craft somewhere on the net to link to and found one over at Martha Stewart. She makes the same idea but just using different sized squares. I bet Mum would have loved to know that before she spent hours cutting out all those stars. Thanks Mum. :-) We are fast running out of time before Christmas but I was hoping to make some more of these this year. The kids have only got one more week of school before the holidays so we may get a chance.

I am still trying to work out what else we need to make, do or buy for Christmas and I am not getting anywhere. There seems to be so much else going on. I am full of ideas but just don't seem to have enough hours in the day (or the energy).  Still have quite a bit of Christmas stuff to share if I can get the photos uploaded.

How are your Christmas preparations going?

Thursday, November 11, 2010

Paper leaves on cardboard trees

The 3 trees

Here is what was made with all those paper leaves I cut out and showed you the other day. The 3 girls made these while Amelia had pump time. I cut the trees out from scrap photo mat board and slotted them together. Then the kids just used some glue to stick the leaves on. I think it's funny how different they all turned out.

Esther's tree

Esther lined up all her leaves nice and neatly.

Ellamay's tree

Ellamay went around the edge with the leaves and then started filling in the centre. She decided that the leaves were like petals and so she made flowers to stick on too.

Amelia's tree

Amelia was very random. She seemed more interested in painting the glue on that actually getting the leaves on :-)

We might add some flowers or apples to them if we do a take 2 with them. I also thought about getting the girls to make a little swing out of pipe cleaners and then cut out a little person to sit on it. That would be cool too don't you think? Wish I'd thought of that the other day when I was getting them all ready to make.

We also used a lot of the leaves the next night on the pump because the girls decided to make green flowers. Sorry no photos of that. They made them up like Ellamay's flower (in her tree photo). After the 'petals' were stuck together like a flower, the girls stuck them to drinking straws for a stem. They looked great. Now I am under orders to cut up lots of coloured paper to make petals so we can make more colourful bunches of flowers.

Tuesday, November 9, 2010

Paper leaves


Paper leaves

More pump time, craft time. Paper leaves waiting to be used.

Friday, August 13, 2010

Home made note books

Today I have Ellamay home from school. Poor darling has an ear ache. Ear aches are such horrible things. So later we will be off to the doctors again. We were up last night for most of the night. We even watched a little bit of a Barbie movie to try to take Ellamay's mind off it. She must be bad because it didn't work.

I don't know what it is like for the rest of the world but when we go somewhere like the doctors, the kids get bored really quickly. Last year, we were at the doctors a lot with the kids and it would drive me crazy the mischief they would find.

I had seen around the Internet about making note books out of cereal boxes and recycling cardboard and paper into little books (sorry, no links). So I tried it. I made some with new card and recycled some old stuff too. They are a fantastic thing to have a stack of so they can get pulled out whenever you need them. Like doctors visits.

Pile of new books

We finished last year's supply a long time ago so I decided I better make some more. We are planning a road trip in the next couple of months and I wanted to have some to take with us. Plus, these books are great to have when the kids friends come over to share around or maybe for a special story writing effort.

Books waiting for tails to be tied

I have a handy, dandy rotary paper trimmer which I use to cut the card and paper for these. I love it. I use to use a blade, steel ruler and cutting mat. That was hard work when there is a big stack to cut! After they are folded, I stamp them with some of my stamp collection and then I sew them with the sewing machine. I only put 4 or maybe 5 sheets of paper in them so they go through the sewing machine fine. That many pages is perfect for my kids. They love getting new note books but don't always like finishing all the pages. I finish the books off by tying and trimming the cotton. I have made them without tying the ends. I just like them this way. :-)

Stack of books

My new stock pile. They should keep us going for a while. Now, I better go and grab some pencils, stickers and a few new books so I am ready to go.

Monday, June 28, 2010

More paper shoes


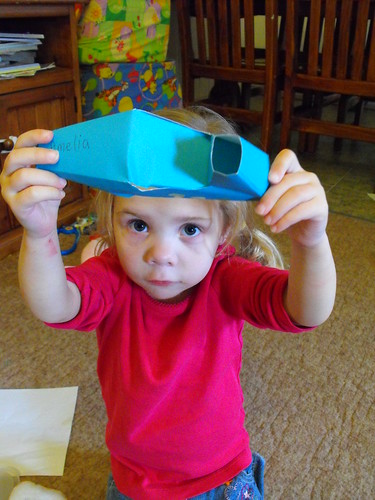
The three girls decided they wanted to have their own paper shoes like I made for their Aunty's birthday. It was a bit hard for Esther and Ellamay to work out how to fold the paper so I ended up doing it all for them. I made 3 paper shoes in different colours. We got out some stickers and they decorated them. Amelia really wanted her photo taken with her shoe. Okay Amelia, but I will have to put it on the blog now :-)


She also really liked that it fit on her foot. She spent some time carefully walking around the house on tip toes just so she could wear it. Esther and Ellamay really wanted to make bigger ones so they could wear them too. Our girls do like shoes! I might have to make some of these for more school holiday fun.

Saturday, June 26, 2010

Easy decorated book for kids


We had a last minute birthday party for Esther and Ellamay this week. It was really just a play and party food. Anyway, I was trying to come up with something for them to do to keep them entertained at the last minute. Having decided only two days before hand I didn't really have much time to do anything really amazing.

I have a pile of exercise books in the cupboard that I buy up on in January at back to school sale time. I got five books for 5 cents! Can't go wrong there. I covered the books in some plain white paper the night before. I gave the kids some of my special scrapbook stickers, bling, flowers and paper cutouts. I also gave them some permanent markers which they love to use but only get to use at special times.

It was a big hit! The five little girls loved making their own special books. When they had finished decorating them, I gave them all a plastic cover to put over their special books. I got the plastic exercise covers in a packet of five from Big W. Their books looked really special then. They were so excited about them. What a relief! I never really know if kids are going to like what I have in mind.

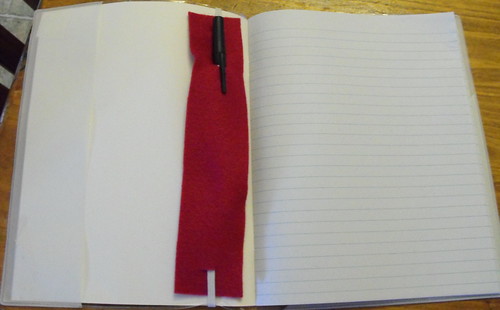
One of the little girls decided she really needed a pen holder in her book. Using a piece of felt and elastic we made a band that stretched around the cover. I just cut some slits for the elastic to slide through and a bigger slit for the pen. Not sure how long they will last but the little girl was really impressed. She said I was really good at making things. Which, of course, made me feel like a pretty clever person. The photo above is Amelia's book. I didn't manage to get photo's of the others because the older girls have been busy using them.


A very successful crafting time really. We will be doing this again. I bought a lot of those books so we will be set for a long time!

Monday, June 7, 2010

Paper shoe

In our extended family, we have five birthday's in June and four birthday's in July. Esther and Ellamay's birthday makes up two of the June birthdays but all the other birthday's are for the grown ups. Now I don't know what everyone else in the world does for birthdays but it can be a pain to work out what people want. Especially when they can generally just go out and buy what they want themselves. So we usually just give cash.


Occasionally, I decide that the cash should be presented in some very cool way. The other night, I made this paper shoe for my brother-in-law's wife. (Hi). I just rolled up the cash and tied it with some pretty ribbon. I ended up enlarging the original slightly, just because it seemed too small. Go here to find the templates and pictures. I am sorry to tell you that it started life as a witches shoe... It's so much prettier here. And I had no idea that witches got around in peep-toe shoes anyway!


I thought I would just add a couple of links to some great templates for boxes that can be used for party favours or making you look clever when you are giving cash as a birthday present ;-) I haven't tried the cupcake one yet but the other site is fantastic and I have used a few of them. I use them for treats on the Christmas lunch table.

Cupcake box template here
Lots of different box and card templates here

In other news, it is Esther and Ellamay's birthday this week and I have sick girls. I hope they are better soon. Ellamay is worst, poor little thing. She keeps saying that this is "the worst day in my whole life". She is asleep on the couch at the moment. It would be nice if she woke up feeling a little better. If not, perhaps we will postpone their birthday for a couple of days.

Monday, March 29, 2010

Look what I've started now...


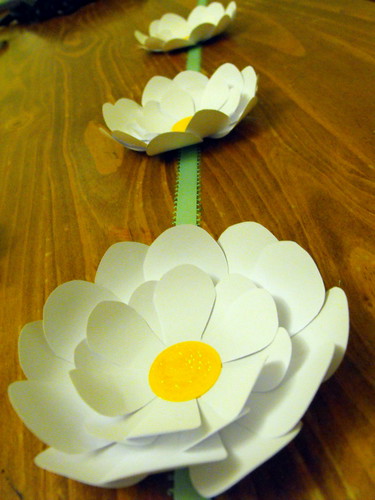
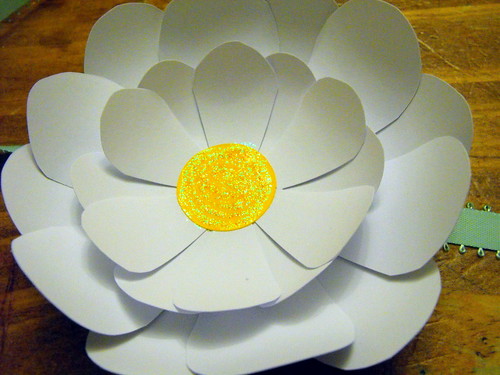
I shouldn't be starting any other projects because I am in the middle of quite a few at the moment (like always!). I decided to have a go at this one though thinking it would be quick. It's rather time consuming cutting out all those flowers but it is kind of therapeutic.
I am on a decorating kick at present. Esther and Ellamay's room is well and truly ready for a make over but the whole house is annoying me. So I will start by doing things that I can achieve easily. Enter - paper flower garlands for the kids rooms. This one is for Amelia's room. I saw this one here and decided I really needed to try it out. I have run out of cut flowers though so I need to trace a few more onto the card and get cutting again.
I have almost finished another character for my resurrection set. One of the women needs hair and the other is started but needs a lot more work. Running out of time! Hope to be back tomorrow with some more pictures of finished felt people.